Evolutionary Modelling With Minimal-Price Kits
by Frank Spahr
Modelling has become tremendously sophisticated over the last years. Not only the after-market suppliers, but also the major companies themselves offer us kits in a previously never-dreamed-of quality, as well in terms of precision, fit and detail. Opening a detail set still makes me gasp at the precision of the delicate brass parts – some of them have taken permanent residence in my carpet meanwhile – or the sheer technical knowhow needed to model and cast resin parts in such a way as, say, in CMK´s Skyraider set waiting on my workbench.
Whether the aftermarket stuff is really useful with modern kits is another question. Brass parts are necessarily only two-dimensional, and with certain items that have a rounded form, the brass part may be finer than the kit part, yet lacking substance. The german FuBl 2 antenna, for instance, found under almost all german multi-engined planes, surely looks better when made from stretched sprue plus some fine wiring than from a photo-etched part. When it comes to cockpits, the dilemma grows worse. Do you prefer the kit cockpit plus some drybrushing, or rather upgrade it with an Eduard set with real holes for the dials plus a slide behind them, or would you rather advocate using a resin cockpit? Somehow, it´s like l´art pour l´art.
I would like to talk about rather different things. When I restarted 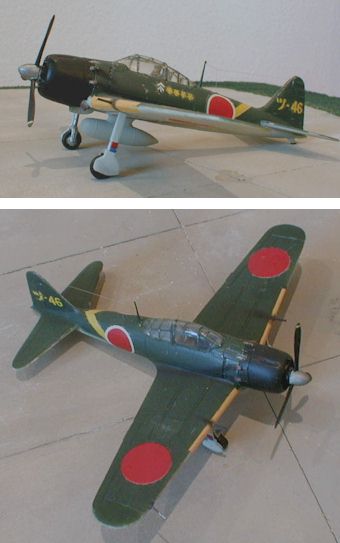 modelling, I had most fun when I took some inexpensive kit in 1/72 and tried to make something of it for myself, using mostly sheet styrene and Zero.jpg (25114 bytes)stretched sprue as ”aftermarket” parts. It gives you some nice feeling for having achieved something from your own accord plus it lets you practice techniques you will need with more expensive stuff. The kits do not need so much shelf space. Last but not least, when you bugger it all, it won´t hurt you…
All the kits described below were priced under 10 DM when I bought them.
Revell A6M Zero
I started with Revell´s old 1/72 Zero. The mold should come from the early 60ies, or so I guess, it´s pocked with rivet heads, they skipped the entire interior, but all in all it somehow looks like a Zero.
I left the rivets where they were, glued the somewhat disfigured pilot into where the cockpit should be, but the kit gave me opportunities to:
- Thin out the propeller blades
- Fabricate an antenna from stretched sprue
- Make a pitot tube in the like manner
- Weather the exhaust tubes with a mixture of Revell rust and iron paint
- Try some exhaust staining with my then newly acquired airbrush plus pastel chalks
- Make wing guns from stretched sprue (today I would rather use sections of hypodermic needles)
All in all, I still like the Zero, and it has survived some ”cleansings” of my collection. My Hasegawa 1/32 A6M5 is still waiting to be built …
Revell Ki-84 Frank
Ki84-3a.jpg (23027 bytes)Next in line is Revell´s Ki-84 ”Frank”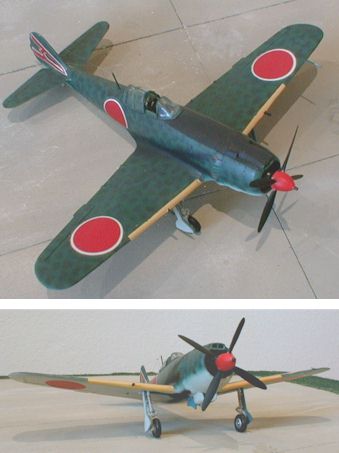 of equal vintage and quality. This time, I grew a bit more self-confident, so I ”scratch-built” some likeness of a cockpit from sheet and stretched styrene and cut open the canopy with a diamond disk so that you had something to look at. The canopy is of course too thick to allow a real look at the inside. By the way, although I´m a dentist and own a vacuform device, I haven´t that far found the right material for vacuforming canopies. So whoever has a tip for me, please let me know.
Moreover, I sanded away all the rivets from the plane´s upper surfaces. Alright, that sounds like not taking things too seriously, but I have to admit I somehow lost heart after some time. I quite liked the results then, but giving the current techniques of highlighting details and my matured look at things, I can´t suppress the feeling that such a surface tends to look somewhat dead. In this case, the camouflage turned things around a bit, since the plane is covered by quite a lot of dark speckles. Airbrushing them was quite demanding and showed me some things about my airbrush…
I used only the kit decals. Of course the squadron insignia didn´t fit, a thing which angered me, but seemingly not enough, since I let them where they were. I remedied that on my next kit, a Ki-61 Hien on which the markings were airbrushed.
Also a small remark about Aotake blue, the elusive metallic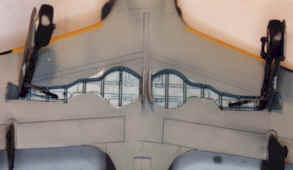 shade used on the inner surfaces of Japanese aircraft. My Ki-84 shows how I did it then. Nowadays I spray the wheel wells silver and cover with a very fine overspray of Tamiya´s Aotake. Add some washing and perhaps yet a bit more of silver, and voilà – see the results at the right. I hope it comes closer to the real thing.
Revell Curtiss Kittyhawk
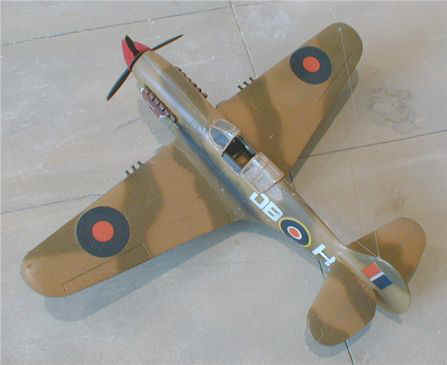
Last in my Revell set of ”cheapies” is the classic Curtiss P-40. Although the P-40 will be eternally associated with the AVG or the ”Flying Tigers”. First, I rather did an interesting South African paint scheme, but I was somewhat afraid of how on earth to put that /&%§§% sharkmouth decal around the plane´s nose (I managed it sometime later with the old Monogram kit). I invested a lot more work into that kit, leafing through the squadron In Action book for the cockpit interior. I scratchbuilt it, the antenna and several other details such as the air intake and the fuel tank suspension.
Besides that, I drilled open the exhausts and the cowling flaps to give them some depth, an effect not visible in the pictures. In this kit, I first used Gunze Sangyo Mr.Metal chrome silver under the paint, so I could do some weathering with ”chipped-off” paint. I still like that model.
Italeri AU-1 Corsair
All in all, Italeri offers considerable quality for a very reasonable price. Not in each kit, but the recent ones – their old 1/72 Focke-Wulf Fw 190 D-9 was a diappointment for me.
My first Italeri model was this AU-1 Corsair, one of the final variants of this legendary and outright beautiful fighter plane. I was so delighted at how Humbrol Glossy Insignia Blue dried out, that I kept weathering to a minimum, just adding some exhaust staining plus exposing the silver paint at the seam lines and tread spots.
Another delight were the decals. They were so thin and fine that they snuggled into each fine detail without any silvering and without any decal softener. Fit was excellent, building went along without much fuss, all at 8,50 DM.
Italeri Focke-Wulf Fw 190 A-8
Having built the Italeri Fw190 A-8, I couldn´t keep myself from some heavy weathering. The particular plane featured in the kit was used during the latter part of the war intercepting allied bombers. These fighters were not treated all too nicely.
Again, the decals were outstanding, leaving no rims or silvering even on a matt surface. Now I have learned to spray my models with gloss paint or coat them with clear gloss varnish before applying the decals. I didn´t do that on this model, but it worked out fine anyway.
This equally cheaply priced kit represents the 190´s rugged construction and typical shape very well. I just added the landing gear position indicator pins plus the FuG 25 IFF-antenna made from a single strand of copper wire wrapped around a toothpick
Airbrushing the model was a lot of fun. Although I have built 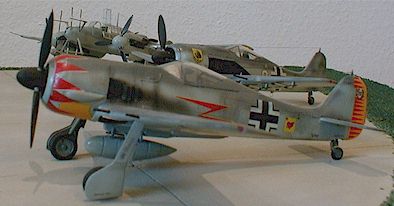 two Hasegawa Fw190 As since, this kit at less than half the price doesn’t stand too bad. Of course, the Hasegawas have finer detail and more comprehensive decals, yet not necessarily better ones, since they´re very flimsy and vulnerable, Graf.jpg (17641 bytes)especially when building Oskar Graf´s plane with the red-and-white triangles all around the cowling – see the adjacent photo. This is my second kit since I King-Konged the first one …
Well, that’s for starters…
I hope I could show how I started improving without destroying too much. Nowadays, I have to admit succumbing ever more often to the lures of aftermarket dealers, having only today ordered the Aires D9-set …
But I´m still the same klutz, having only yesterday ruined the canopy of my Revell 1/48 Me 410. I masked the inside with Parafilm M, primed with Testors Magnesium and sprayed with RLM 02. On removing the Parafilm, I found that some of the very thin magnesium metalizer had seeped under it. Alright, no problem, take your Q-tips and Ivoclar resin polish and off you go, I thought. Bad idea. Nearly each part now revealed that it had had some microscopic cracks into which the metalizer had seeped. Finito. New canopy ordered (Thank you Heinz Dieken of Ikarus Mail order!)
Keep on klutzing!
This article was originally published in IPMS Stockholm Magazine in September 1999.


