Tamiya’s 1/72 Messerschmitt Bf 109E is an Easy Build
by Martin Waligorski

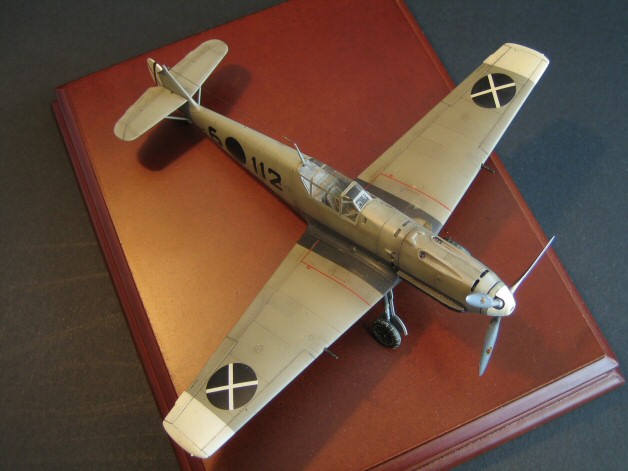
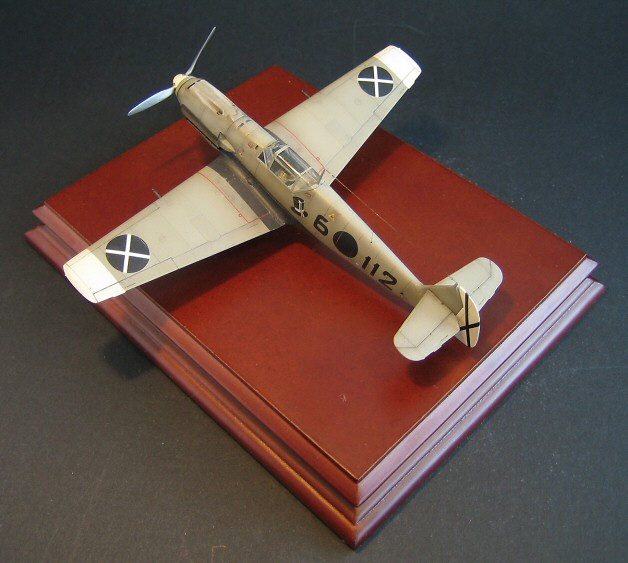
This is Tamiya’s superb Bf 109 in 1/72 scale, built and finished as E-3 model from the Spanish civil war. The notorious Legion Condor is usually associated with earlier, Jumo-powered versions of the Messerschmitt’s fighter. However, a fairly large number (44 to be exact) of E-1 and E-3s was supplied to the unit from Autumn 1938 until early summer 1939. Their operational career was short and relatively uneventful – they supported the conquer of Catalonia during the first two months of 1939, the last major military operation of the Civil War. By that time the Republican aerial opposition already ceased to exist. During the summer the unit was disbanded, the Luftwaffe personnel returned to Germany and at least some of the the aircraft handed over to Spanish Nationalists.
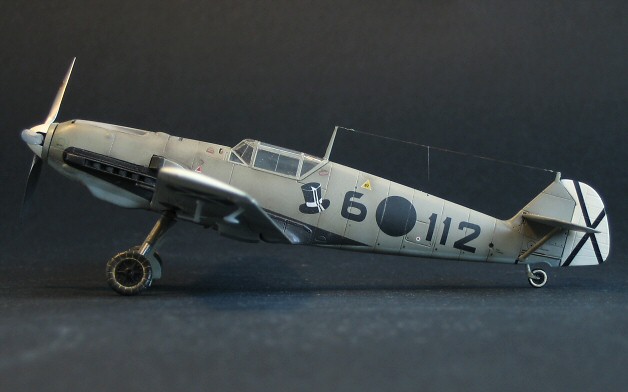
The depicted aircraft marked 6*112 belonged to 2.J-88 based at El Prat de Llobregat in Catalonia.
The Tamiya Kit
There are few words that I have to say about the Tamiya kit except praises for its brilliantly simplistic engineering. The single sprue looks very lonely sitting there in the bottom of the large box, but once you start building, you immediately appreciate the excellent fit and the detail incorporated to such a small number of parts. This kit is either perfectly suited as a weekend ”slammer” or a basis for some serious superdetailing.
No kit is perfect, and this one has also a few flaws. The most serious one is the length of rear fuselage, which is a bit too short, giving the model’s tail more taper than should be the case. ICM, which has otherwise copied the Tamiya kit, has corrected this in their 1/72 Bf 109E, but if you have the original then this could be pretty difficult to correct. The second dimensional flaw of Tamiya’s Emil lies in the tail wheel which is too small.
As I planned to build this model straight out of the box, I chose to ignore these dimensional problems and proceed as per kit instructions. Only later I chose to actually replace the tail wheel with another one featuring an enlarged tyre. This is also the one visible at the photos. I have also retained the original tail wheel so that I could still enter the model in OOB contest category – they’re interchangeable!
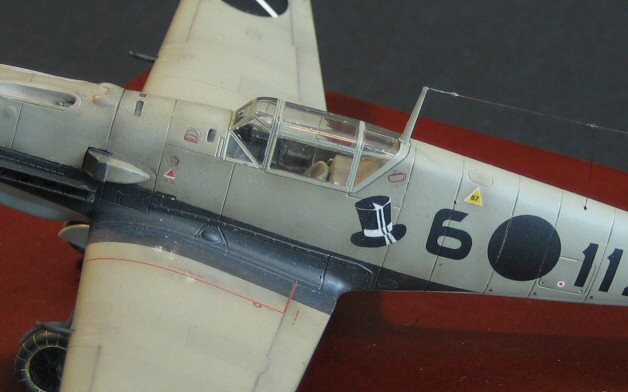
I thought that the cockpit interior was adequate for the close canopy configuration. However, the early model canopy provided with the kit is very thin and , coated with Future floor wax, provides excellent view into whatever’s underneath. In this view I should have probably replaced the decal seat belts, or left them on the backing paper for better scale appearance.
The rudder is supplied in the kit as separate part and could be positioned off-centre, a nice break in the model’s geometry.
In the end, the only own addition to the model was the antenna wire, made from nylon fishing line.
The Paint Scheme
I was always attracted by ”graphic” paint schemes and have long thought that the solid grey Legion Condor livery with black-and-white markings would make an attractive model. Unfortunately, I haven’t come across any decal sheets for ”Spanish” Emils in this scale. Therefore, having stumbled upon a dirt-cheap second-hand RPM kit of Bf 109E in Legion Condor markings, I knew what to do. Compared with the Tamiya offering, the RPM kit was very crude indeed. However, the decal sheet, printed by Intech, was very nice, in-register, and contained markings for no fewer than six different Legion Condor machines.
An invaluable help during painting was the discovery of the entire collection of photographs of Bf 109s in Spain on the web. Checking with the photo of real 6*112, I have decided to shorten the top-hat symbol to match the original.
The paint scheme turned out to be more complex and time-consuming to apply than it looked at first glance: many colours were involved and some intricate masking was required, for example for the black designs around engine exhaust/ wing walk areas.
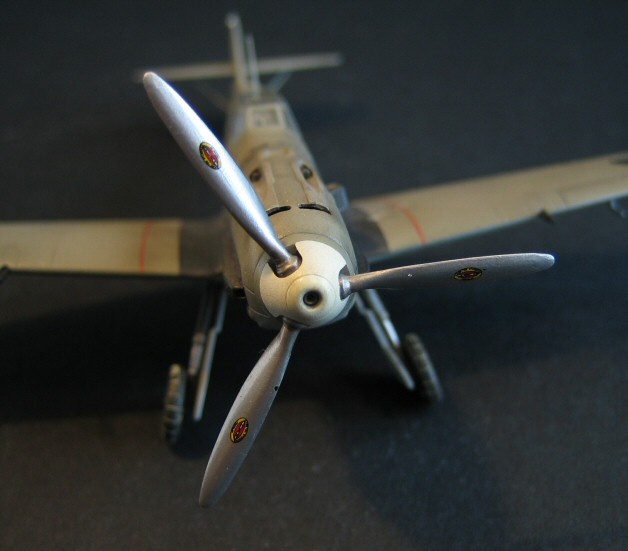
There were some intricacies to the early Bf 109s’ paint schemes. Cowling gun troughs were painted in heat-resistant grey paint. The supercharger intake was delivered painted from a subcontractor and was thus green even on Legion Condor machines. The biggest surprise, however, was the propeller. Apparently some of the propellers on those early-production Emils were delivered in shiny polished metal, carrying Hamilton Standard rather than VDM logotypes! An interesting detail for which I couldn’t find any further description in my references. I suppose that Hamilton Standard could have provided some of the first propellers before VDM got along with their own production.
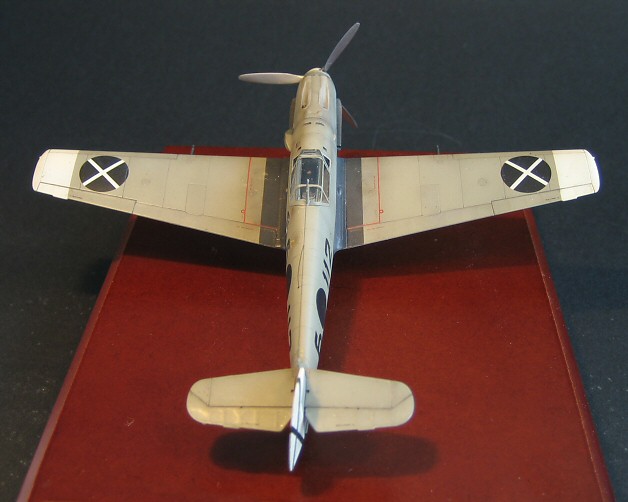
I also think that white elements of decals are often too paper-white in shade, so the rudder and wing markings were painted using the same shade of off-white as the wing tips.
I airbrushed the model using Gunze, Vallejo and Tamiya acrylics. The propeller has been coated with Alclad II.

The weathering commenced with a medium-grey wash. I always try to apply enamel washes on acrylic base and vice versa to avoid dissolving the underlying paint finish. This time then the wash was Xtracolor diluted with white spirit. This was applied quite liberally to flap, aileron, slat and elevator separation lines, and more restrictively also to selected panel lines, especially those around the engine which is the natural area where oil and exhaust residue collected on real aircraft.
The bulk of the weathering effects was done by post-hading with a mix of 5% Tamiya Black + 5% Red Brown + 90% Tamiya thinner, applied by airbrush. During post-shading, I prefer to treat entire surfaces rather than mechanically emphasize all panel lines. The process involves a mixture of masking and free-hand airbrushing, but the results achieved this way can be pretty subtle.
I found that the weathering can be done much better if you consult the photographs of real aircraft and try to identify and follow the real patterns of dust and grime. Thus, comparatively more dirt and shading was applied to the engine cowling, wing root area and, in the ”fishbone” pattern which was peculiar to Bf 109, to the lower fuselage.
Finally, I applied some traces of dust to the the wheels and wing walks using MiG’s pigment powders.
The Result
The Tamiya Bf109 kit is so easy to build and looks so nice when completed you almost can’t help but smile when you build it. Purists are advised to purchase the ICM kit (sorry Tamiya) for the sake of the longer fuselage. Or combine both kits, since the Tamiya original actually fits a little better.
Despite the simplistic nature of the construction phase, I was really happy with the way that this model turned out. It also brought me a gold medal in the 1/72 OOB category at Scale Modelworld 2005.
Only when the model was completed, a colleague came with the information that 6*112 was actually a E-1 model, so that the wing guns on my model should have been removed. Although this could not bee seen on the available photo of this Bf 109, the version could be established through other available records. Oh well, is there such a thing as perfect accuracy? Apparently there isn’t!


This article was originally published in IPMS stockholm Magazine in May 2006