Lockheed F-16 in 1991 Tiger Meet markings
by Ricardo Dacoba
By 1960, the French minister of defense, Pierre Messner,  took an initiative to make to promote French-American relations. On his request, the Commander-in-Chief Europe created an association to improve relationships between individual combat squadrons within NATO..
The USAFE 79th TFS (Tactical Fighter Squadron) took the initiative and on 19 July 1961 they invited No.74 Squadron Royal Air Force and Escadrille Chasse 1/12 Squadron of the Armée de l`Air to Woodbridge in England. For the participating aircraft event, all units agreed to adopt a common graphical logo of a tiger, since all units carried it one way or another in their official emblems.
Due to the success of the first meeting it was decided that future events would be held annually, and a Tiger Meet tradition was born.
While in the early days the Tiger Meet was mainly a social gathering from Tiger squadrons things changed rapidly and first-class tactical flying exercises were soon implemented into the Tiger Meet program. Later, even the once quite restrained tiger markings have expanded to striking displays of airbrush art, sometimes covering entire aircraft. This Lockheed F-16 of the Belgian Air Force has arrived at the 1991 Tiger Meet, held during the International Air Tattoo at RAF Fairford in Great Britain.

The kit
My selected kit was Fujimi 1/72 F-16A. This kit is older, but still going strong and fully workable to a good replica. The initial advantage was that it came with the decals of my subject Belgian aircraft.
I chose to work in major subasemblies: fuselage, wings, horizontal and vertical stabilizers to facilitate easier painting.
Construction started with the engine air intake duct. Due to the F-16’s large opening, the inside of the duct can be easily seen on the model. I shaped and re-shaped the duct with epoxy putty to achieve decent finish of the internal surfaces. As it turned out later, this was the most difficult part of the model’s construction.
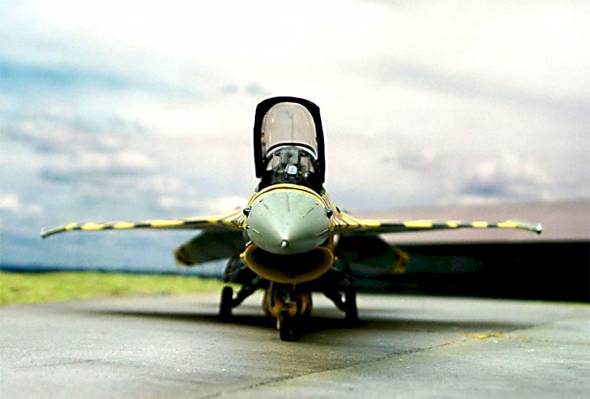
Another modification I made to the kit was opening the canopy. 
This was tricky because the massive lower canopy frame was moulded integrally with the fuselage. After some consideration, I traced the outline of the frame and then cut it off using extreme care and holding my breath! Parts separated, the rim of the fixed part of the canopy was restored by gluing a strip of plastic card on top of it.
The ejection seat was replaced with one of my own construction. The forward decking above the instrument panel was also reworked, HUD display being added from clear plastic sheet.
Detailing the exterior
Based on the reference photos, I opted for opening a few 
wents – example being these at the wing roots or around the cannon port. First I thinned down the plastic from behind using my Dremel tool. Care and frequent checks against the light were applied until the thickness of the plastic was decreased to a few tenths of a millimetre. Then the actual grille pattern could be cut out gently with a pointed scalpel blade.
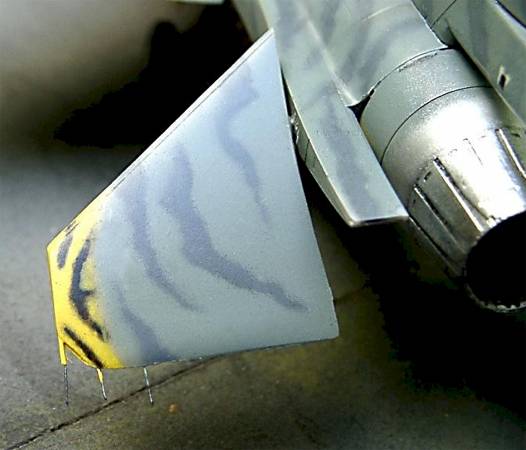
After closing the fuselage, I reworked and detailed the base of the elevators on each side, to enable them being displayed in off-level position.
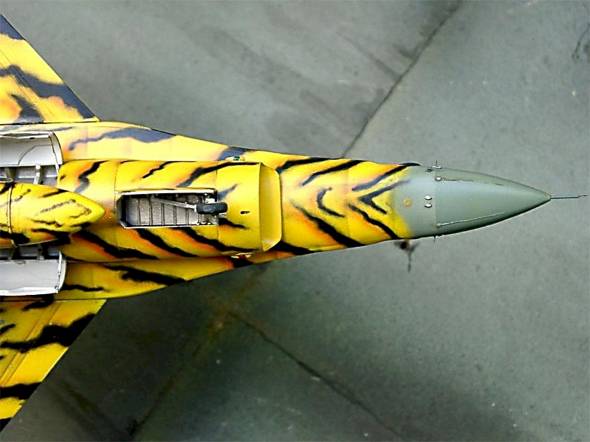
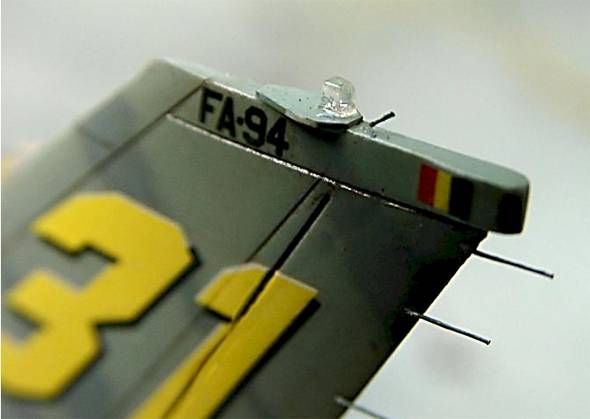
Lengths of very thin stretched sprue were used to reproduce reinforcements on the nose radar dome.
Next was the engine exhaust nozzle. The external ”petal” 
detail was moulded reasonably well, but the inside was completely bare. I went about looking for a suitable item to add the impression of internal detail, and opted for photoetched ammo belts from a 1/48 scale ProModeler B-24 Liberator. While strictly speaking the resulting pattern is not accurate, it looks very convincing.
Attention now turned to the wings. The trailing edges had a decidedly thick appearance and they had to be sanded down quite a bit.
Rather than cutting off and repositioning the flaps/ailerons, I run along the hinge line on the upper and lower sides with a scriber tool until I was able to bend them a couple degrees off-neutral.
I have also added some detail to the Sidewinder missile pylons at the wing tips with strips of plastic sheet.
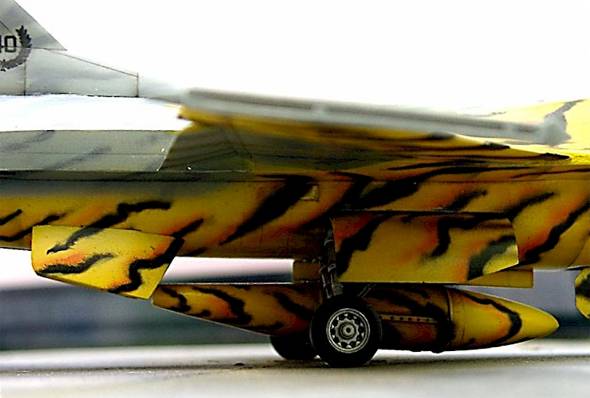
The undercarriage and wheel wells did not undergo modifications, just a couple of minor additions such as wheel cover actuators, brake lines, electrical cables and landing lights.

Painting
With all the subassemblies complete, it was time for painting. As I stood in front of detailed freehand painting job, I chose at this point to keep the major components separate until the painting and decaling was complete.
I first applied a base coat of gloss white. Besides providing a right ”tooth” for the subsequent coats of paint, white is a good base colour for yellow, resulting in more vivid yellow shade. When the base coat was dry, I painted yellow and then grey parts of the airframe.
Then came the stripes, and they are not decals! I airbrushed them freehand. No masking was done between colours, however I have pencilled in guidelines along the centre of each stripe to have some visual aid for airbrushing.
I used Tamiya Acrylics and precision airbrush at its finest setting. 
I admit that it required steaaaaady hand and precise control over air and paint coming from the brush. At this stage of the work it proved helpful to work on smaller subassemblies, so that the painted part and the hand could remains ready on the table surface rather than having been balanced in the air around each other.
Colors used were FS 36375, 33538, 35237 and 37038.
After the scheme was completed, the assemblies were clear-coated for decals. I applied the markings using decals from the Fujimi kit.
The model was then assembled and the necessary touch-ups made with brush and airbrush. Several light coats of Testors Visions clear followed, each sanded lightly with fine grade until the decal film was completely undistinguishable from the surrounding surface. Just before the final clear coat, I have decided to spray the model with a thin filter of dark brown to tone down the contrasts and give it a more weathered look.
So would I do it again? Yes I would. While the painting job may seem difficult, it was manageable, and there was nothing particularly difficult about the actual technique. Just that steeeeady hand, and it is a skill which is always good to improve.


This article was originally published in IPMS Stockholm Magazine in October 2003.
(Ricardo’s model was featured in the May 2003 issue of Fine Scale Modeler – Ed.)