Tamiya P-51D – With Some Advice
by Tomasz Gronczewski
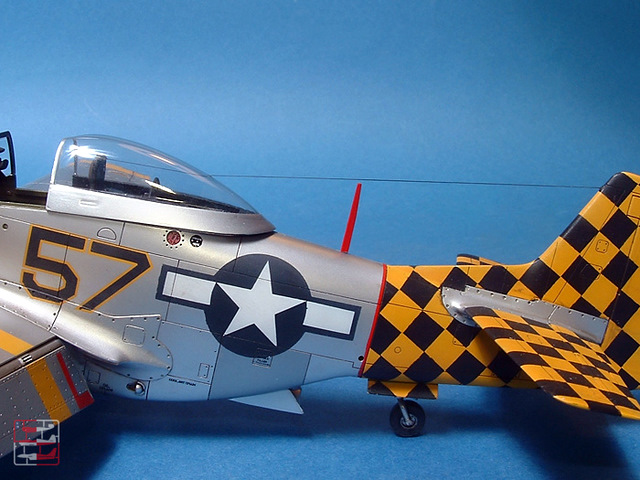
Here is my 1/48 Tamiya P-51D finished as the mount of the second highest-scoring ace of the Checkertail Clan – Capt. Harry Parker (13 victories).
Operating in the Mediterranean Theatre (MTO), the Checkertail Clan, officially known as 325th Fighter Group flew its first missions from North Africa, while part of the 12th Army Air Force, flying on venerable Curtiss P-40s. In November 1943, they became part of the 306th Fighter Wing, and moved to Italy with the newly formed 15th AAF and operating P-47 Thunderbolts. In 1944, another equipment change made the 325th the Mustang group, first with P-51B and Cs, and from July 1944 also P-51Ds.
The group was formed by three Fighter Squadrons, the 317th, 318th, and 319th. They accumulated some impressive statistics. Together with all the other groups in the Fifteenth Air Force, they formed an integral part of the Allied Air War. Sadly, the hero of this story Harry Parker didn’t survive the war, killed in action in April 1945.
The Colour Scheme
Little is known about the serial or even exact the exact version of his Mustang. All Parker’s victories were scored with P-51D-5-NAs, even the final kills in March 1945. Though the fin fillet seems to indicate later built P-51D, it could have been retrofitted to P-51D-5 as well. The presence of the inner yellow bands on the wing roots is unconfirmed. I believe they should have been there while the squadron operated from Rimini, in March 1945. The only blurry photo of the real thing had been made under strong sunlight, and the entire upper wing surface looks like a solid white spot.
The Tamiya Kit
Tamiya’s P-51D is arguably one of the most built kits in the world. I have myself bought over twenty, and amazingly finished the majority of them. Currently there are only three unbuilt kits remaining in my stash! the huge advantage of this kit is ease of assembly, making it a weekend project if you decide to build it directly out of the box.
With the experience of over fifteen constructed P-51D models I can find only three weak areas of the kit that are worth mentioning.
- Canopy and windscreen. Tamiya’s idea of engineering the sliding canopy in two parts was very bad indeed – whatever you do, there is no way of concealing the joint between the clear part and the solid frame. Bad is also the presence of sprue gate at the side window of the windscreen. Worse still, this joint is often subjected to further tension in transport, resulting in internal cracks inside the clear part. It’s worth checking next time before you purchase this kit.
- Propeller spinner is also engineered in two separate parts. Eliminating the join line requires awkward and tedious work with wet-n-dry. Some people criticise the shape of the propeller blades being wrong, but you should know that there are other minor dimensional inaccuracies in the kit and the propeller isn’t the most prominent one 🙂
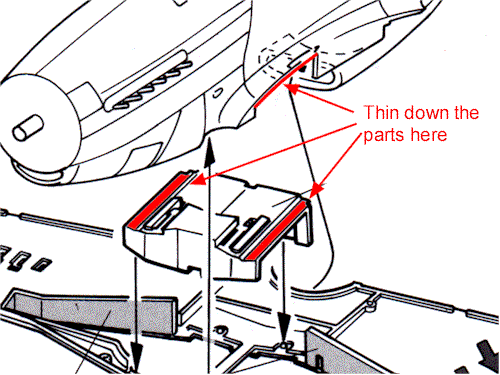
- The wheel well insert. This part has been frequently criticised for oversimplified representation of the main wing spar. However, it also incorporates the only real fit problem of the kit. The part is too high and when assembled, leans from below on the fuselage sides pushing them slightly apart. This apparently small deviation is then easily carried over to the wings, causing insufficient dihedral. I have seen dozens of Tamiya Mustangs on the net with dihedral visibly too small due to this problem.
The remedy is very simple, you will need to thin down the roof of the wheel well insert before assembling the wing. An now you know it’s necessary.
Construction
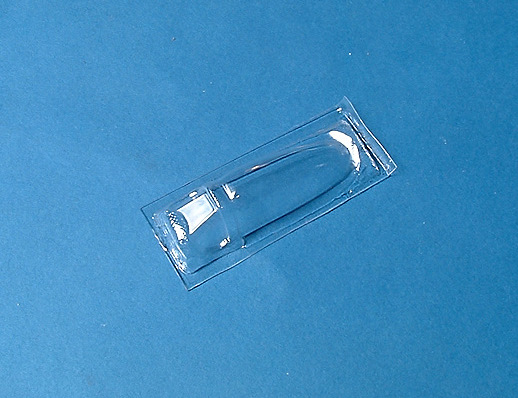
This project was planned as a therapy – to regain motivation for aircraft modelling after a lengthy interlude in tanks and armour. I have built the model straight from the box except for the sliding part of the canopy taken from the Squadron vacuum-from set.
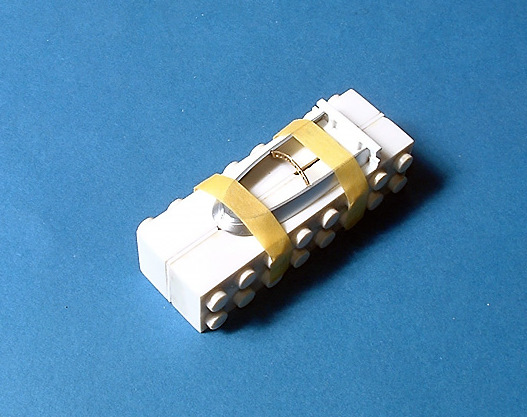
As Squadron canopies are very flimsy I have opted to reinforce it from the inside using the kit lower canopy frame. The latter part was suitable thinned down. Then, both parts were glued together using two part epoxy and a simple makeshift jig to align the two parts.
I have used the kit windscreen to avoid any fit problems with the vac-formed part.
Painting and Finishing
The NMF finish has been done using venerable Alclad IIs with White Aluminium as the main shade of silver.
Real fun begun with the markings. Almost all the markings on this model have been painted with the aid of the vinyl masks. Only the victory marks and small stencils were decals!
Because of the excessive masking required for application of the multi-colour chequers and numbers, I have covered the entire model with a thin coat of Tamiya White Surface Primer.
The tail was first painted entirely in yellow using Tamiya XF-3 yellow with a dot of XF-7 red. Then the tail fillets were masked off and I began to apply square masks, cut of Oracal self-adhesive vinyl foil. With all the masks in place, the tail was sprayed again with Humbrol No. 85. The masks were then removed and the entire tail airbrushed with Future Floor Wax, only to apply masks again for the tail fillets and cover them with Alclad White Aluminium.
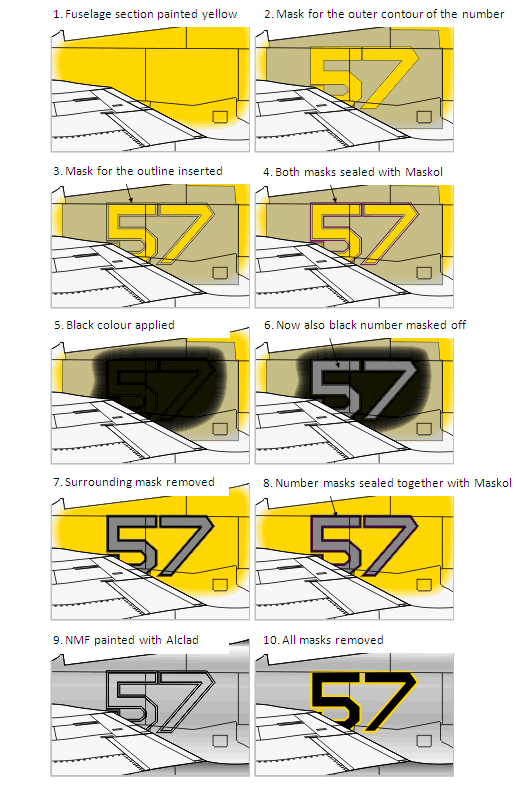
Producing the number ”57” was another challenge and required some careful planning. The procedure is best described by the following sketch.
This article was originally published in IPMS Stockholm Magazine in december 2007


