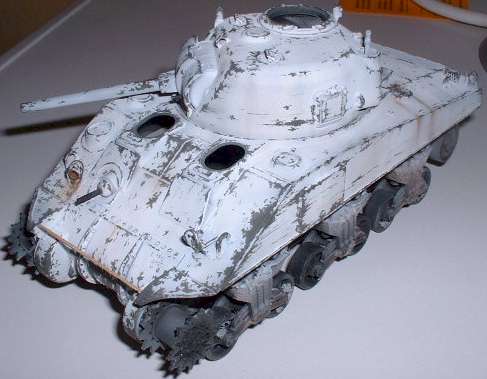
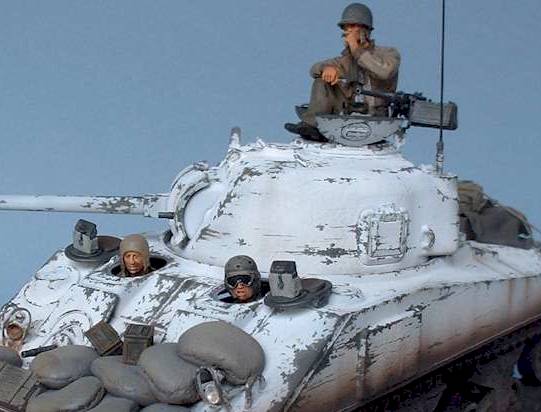
The Classic US Medium Tank in Winter Camouflage
by Anders Isaksson
The Sherman medium tank was the major AFV of the Allied forces in World War II. With more than 55.000 produced in all versions it was used on every major front throughout the war and beyond.
The five main versions of the Sherman were designated M4 to M4A4. The subject of this article, M4 Sherman with welded hull and a gasoline-powered radial aircraft engine was one of the the most widely used types.
The Tamiya Kit
Tamiya’s M4 is labelled as an early version but I have been told that it actually represents a mid-production version. According to information from the Missing Links Allied AFV Discussion Group there are a number of details that should be corrected to accurately portray an M4. The major error is the design of the bogies which features the later, up-swept return rollers as on Tamiya’s kit of the M4A3. The other detail is the look of weld seams. These should stand proud of the hull instead of being recessed. Since I did not want to purchase new bogies or modify the ones in the box I chose to go ahead with the kit items. Also I did not feel like replacing the weld seams and decided that the existing ones would do.
Camouflage Considerations
I first wanted to make a simple diorama set in Normandy on the summer of 1944. During construction I test-fitted the figures from the Warriors U.S. Tank Crew Summer Dress which would be perfect for a Normandy Sherman. However, when I realized that the commander would not fit the turret as intended I dropped the idea. At the same time I came across Marcus Nicholl’s excellent M10 in Tamiya Model Magazine International. It was finished in a winter camouflage and I decided to try a similar finish on my M4.
In consequence, my M4 is shown as it could have appeared in late -44 or early -45. However, had I known from the start I was going to finish the model this way I would have included a few solid road wheels and maybe the search light on the turret roof (both items supplied on the sprues but intended for the M4A3), just to indicate some field modifications and repairs.
Construction
A basic but important improvement to this kit is adding sponson floors 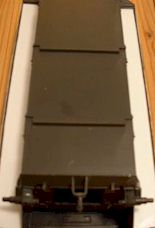 from sheet styrene. If left as is you can see right through the hull when looking from the side between the upper run of the tracks and the hull sides. Other simple styrene details are mounting strips for the sand shields which run along the lower edges of the hull. I added these from strip styrene.
While the rest of the kit bulk was built almost straight from the box, I opted to replace a few of the overscale detail items included in the kit with photoetched parts. Looking for a fairly basic set I found just what I was needed in Ordnance Models set no. 4007 for designed for Tamiya’s M4 Sherman.
The set contains enough parts for one kit and the major improvement are replacement brush guards. It also provides the mesh for rear air intakes on top of the hull as well as a few details for the transmission cover and front mud guards.
Other extra details include resin and photoetched periscopes from 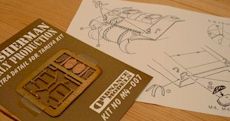 Royal Model. I am not sure this is the correct style of periscope for the M4 Sherman but they still are a vast improvement compared to the kit detail. To complete the hatches I added handles made from brass wire.
A last-minute improvement was made by substituting the solid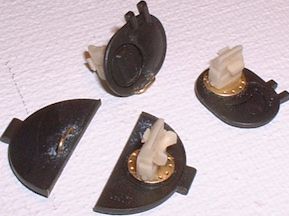 plastic headlights with MV lenses. I found these to be a great improvement over solid plastic lenses. If you cannot find MV lenses, don’t worry: looking at reference pictures of Shermans in service it is apparent that the lights took a lot of beating. Often the brush guards were also deformed with broken glass, or the whole assembly completely missing. I incorporated some damage to the right headlight by simply drilling out the headlight, simulating a broken glass and missing light bulb. I also bent the brush guard. The left headlight was left intact.
The kit-supplied M2 Browning machine gun was replaced with the Royal Model kit made of resin and photoetch. While the RM kit certainly was an improvement over the kit item, I found the assembly to be a bit difficult with all the small parts involved. The finished gun looks stunning and was well worth the extra effort.

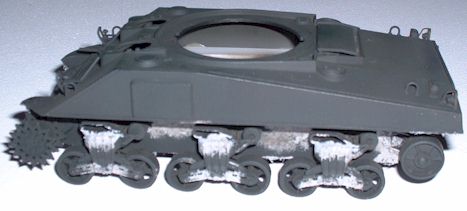
This picture shows the excess of my detailing job. Most of the details are in place prior to painting.
Painting
The assembled model was first given an airbrushed base coat of Tamiya XF-62 Olive Drab mixed with a little XF-1 black. The exact shade is hard to tell and I do not think it is important – it just serves a base coat for the winter camouflage.
At this stage I decided to apply mud to the lower parts of the chassis. The mud is a mix of Tamiya putty, liquid plastic glue and ground coffee (my favourite mud component, which I have described earlier in my M4A1 and M113 articles on this site) . A small amount of static grass was also added. This mix was liberally applied on all areas around the tracks and the rear parts of the hull as well as the underside of the transmission cover.
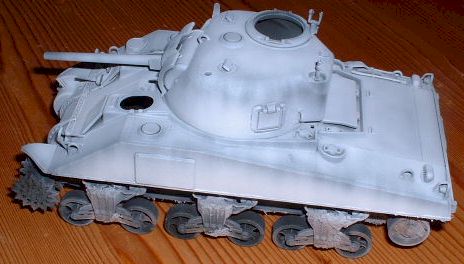
With everything thoroughly dry I continued with the winter camouflage. This mix consisted of Tamiya XF-2 white mixed with a few drops of XF-62 Olive Drab to tone it down a little. When applying the white coat with my airbrush I made sure that the base coat showed through – especially on the upper parts of the hull and turret. After the first coat I was quite satisfied with how it looked. However, after the picture below was taken I decided to add another coat of white to further tone down the base color.
Weathering
With the basic winter camouflage complete it is time to start the weathering. I wanted to depict a vehicle in a well worn winter scheme where scratches and general wear and tear has exposed the drab surface underneath – a perfect opportunity to try the popular paint chipping technique.
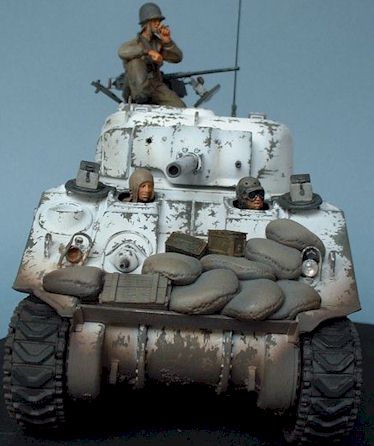
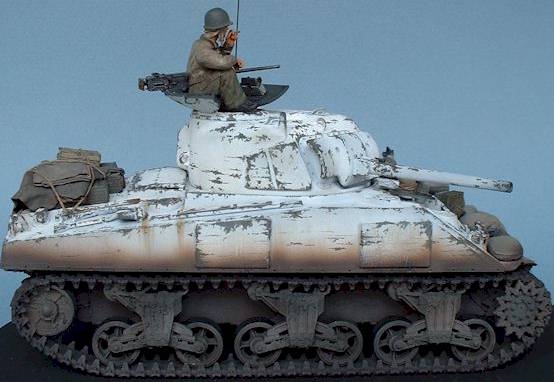
To apply the scratches and chips I used a 000 size pointed brush and Humbrol no. 66 Olive Drab. Rather than applying small dots randomly on the entire model I initially concentrated on the areas on and around the hatches, producing larger areas of pure drab color. After these were finished I continued and applied chips between these areas as well as on most edges. I wasn’t sure if the final effect would be totally convincing but when looking at pictures of real winter Shermans it seemed like the the white coat came off in large flakes and not just as small scratches and chips.
The diffiicult part is to make the scratches and chips to look like, well, scratches – rather than brush-painted spots. I believe the key to get convincing results is using a very diluted paint mix which does not build up too much and to apply a mix of small and large spots.
I also made sure that scratches on the turret and hull sides go in a horizontal direction to simulate that the tank has travelled through foliage and undergrowth.
The ”scratch and chip” process was great fun but took quite a long time to complete. I must have spent 5-6 hours just on applying the Olive Drab spots. I also goofed on the turret roof (it suddenly was too green compared to the rest of the model) and had to apply a new coat of white to start over. Fortunately this is not visible on the finished model.
After the job was finished I still wasn’t sure if the effect was right or wrong – but I really like the way it looked! Well, I guess if it looks right…
To finish the weathering stage I added rust to the damaged headlight and just a few bolts on the hull front and turret mantle. The rust is a heavily diluted mix of Burnt Umber artist oil color mixed with various amounts of Humbrol 62 Leather. I used the same mix to simulate fuel stains around the fuel caps and along the sides of the hull.
Finally it was time to complete the lower hull and tracks. I made up three different mixes of dirt color from Tamiya XF-52 Dark Earth, XF-1 black and XF-64 Red Brown. The different mixes ranged from light brown to some nearly-black brown. These were then used to airbrush the tracks, suspension and all around the lower hull including the front and rear. I used the light shade mainly on the parts that were free of mud. The darkest shade was applied to the parts covered in mud to simulate mud that is still wet.
I completed this stage by dry-brushing the running surface of each road wheel with a mix of Humbrol no. 33 black and no. 112 Tarmac. The tread surface of each track pad was picked out with the same mix using a fine brush.
The various tools had been attached to the hull already before painting and were now attended to in a similar way. The metallic parts recieved fine scratches and paint chips from Humbrol 67 Tank Gray. Humbrol 29 Dark Earth was used on the wooden areas.
Final details
With the major painting complete it was time for the final exterior details. A plank to hold extra gear on the front hull was cut from North Eastern HO Scale Lumber, painted Wood Brown and glued in place between the front mudguards.
The armor of the Sherman was inferior to most types of enemy tanks they would encounter and there were a number of ways improve protection – adding sandbags to the hull being one of the most common solutions.
I used Milliput (white) to make sandbags and attached them to the front hull one by one. To protect the painted hull during the work I carefully taped a piece of household plastic wrap to the front.
I made sure the bags conformed to the wooden plank and 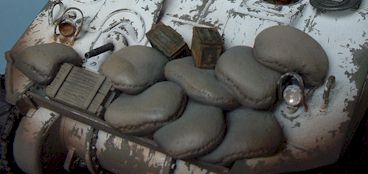 laid natural on the left brush guard but also kept in mind to make a layout allowing them to be removed when hardened. I also incorporated a few ammo boxes from Verlinden and Royal Model to represent the clutter often seen on US vehicles.
I made sure the sandbags and various boxes sticked together when while the Milliput was hardening. This way I have obtained a separate assembly making it an easy paint job. The whole set was airbrushed with a mix of Tamiya XF-1 black, XF-52 brown and XF-57 Khaki Drab. The boxes were picked out by handpainting a mix of Humbrol no. 29 Dark Earth, no. 72 Khaki Drab and no. 66 Olive Drab. Once the whole assembly had been painted it was glued in place on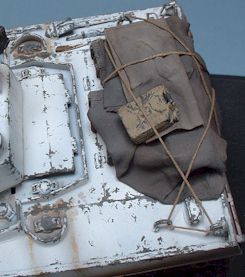 the hull. I made an extra pass with the dirt color on the right and left front corners of the sandbags to make sure they would blend in with the rest of the hull.
The gear on the engine deck consists of different boxes from Verlinden and Royal Model and a jerry can from Tamiya. Everything was hand painted in suitable Humbrol colors. The tarps were made from three pieces of fine silk. They were soaked in a heavily diluted mix of white glue and water and folded. Once positioned on top of the crates they had wrinkles worked into them using a tip of a pencil.
The tarps were all painted using the same color mix as on the sandbags. Fine thread used for boat modelling was painted Humbrol 72 Khaki Drab and used to tie the gear to the deck. Once again the lower rear end of the tarps recieved a coat of dirt color to make everything blend in.
Remaining details such as inside surfaces of the haches, periscopes and machine guns were then painted and attached to the model.
The crew figures come from Warrior Scale Models. The set is called US Tank Destroyer Crew no. 1 and contains three crew members in rather relaxed poses.
Since the front hatches of the M4 are so small I could not use the arms for the two half-figures, but I was just as happy as it saved me some time and effort in completing them.
The clothes were brush-painted using Humbrol enamels (mainly no. 155 Olive Drab and no. 72 Khaki Drab). The skin areas were finished in oils over a base coat of Humbrol 63 Sand.
The final detail to add was the radio antenna which was made from stretched sprue. It was painted black and attached using super glue. It may be a little too short: I had to cut off a piece to make the model fit in the cardboard box I had designated for its transport!
This article was originally published in IPMS Stockholm Magazine in May 2001.
