by Jesper Knutsson
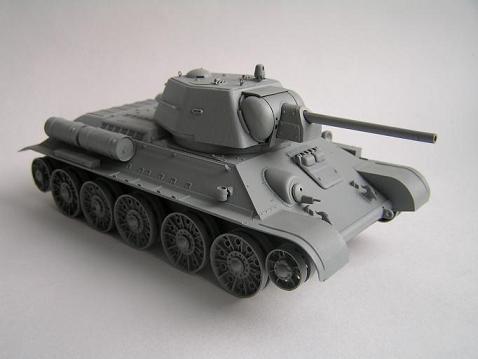
Picking up another of Tamiya’s old kits (having previously built the PzKpfw IV D) I did not expect much in ways of details and refinement since the early Tamiya kits are known for being liberal on the dimensional accuracy due to kits being constructed with motorization in mind. Opening the box one is met by sprues in some pretty unattractive dark green plastic, the usual leaflet with build instructions, decals and one piece rubber tracks. This kit does not contain many parts, and it is perfectly possible to assemble the model in 3 – 4 hours if one is being reasonably quick.
As expected the parts were quite crude, made of thick plastic and in general lacked fine detail. Nonetheless the kit assembles well without any major annoyances. One thing I discovered is that the idler wheels seem to be positioned too close to the road wheels, most likely due to the rather wobbly construction of the wheel axis running through the hull. I am sure this can be fixed rather easily.
Painting
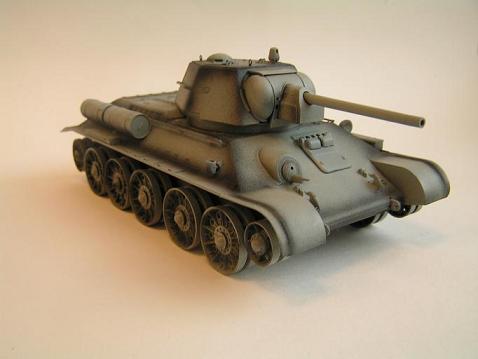
After the straightforward out-of the box assembly it was time to move on to the painting and weathering. I decided from the beginning I wanted a rather dirty tank to practice and test using pigment powders. Initially I washed the model in water using household detergent and thorough rinsing afterwards. When completely dry I sprayed a layer of grey car primer to have a good surface for the paint to adhere to.
After the primer had dried I loaded the airbrush with Vallejo’s black acrylic and went on with preshading edges and panel lines to create a ground for some tonal variation in the base pain later on.
For the base coat I selected Tamiya’s XF-61 Dark Green, XF-63 German Grey and XF-2 Flat White mixed in 10:4:4 proportions and thinned with isopropyl alcohol 1:1. This mixture was sprayed lightly in thin layers to allow the pre-shading in the previous step remain visible.
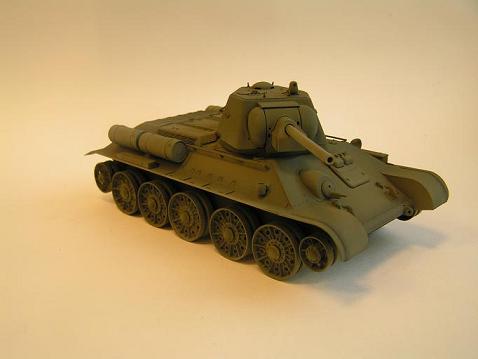
The base coat were then sealed by two passes of Pledge acrylic floor wax (also known as Future) thinned 1:1 with water. Decals were applied on the turret about one hour later when the Pledge coat was dry. The decals were then sealed with a couple of brush strokes of Pledge. Unfortunately this procedure still left me with silvering of the decals which I attribute partly to own inability and partly to the decals being Tamiya-thick.
Weathering
The Pledge provides a good glossy surface for the subsequent washes. These were applied using Windsor & Newton water-based artists’ oils, black mixed with about 30% burnt umber, all thinned with water. This worked fairly well, but for my next build I will try using conventional artists’ oils thinned with turpentine. The wash was applied in recesses, around bolt heads and so on to accentuate and bring up the scale.
After the wash I continued working with oils, applying tiny dots of paint directly from the tube and then working the paint over the surface using a brush, thus creating the effect of rust, oxide, dirt, faded paint and so on. For this purpose I used yellow ochre, Indian red and burnt sienna.
The next step was to seal all this with a layer of Vallejo clear varnish with matt finish. This lowered the contrast a little and brought the colours together somewhat to make the impression a little more harmonious.
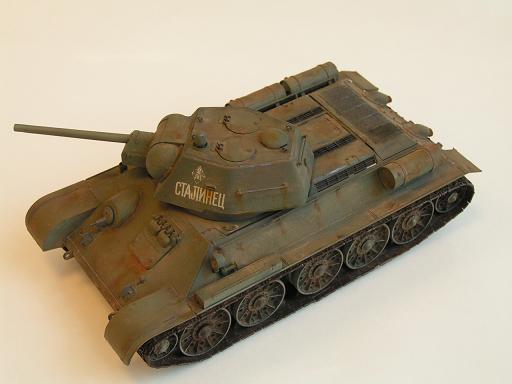
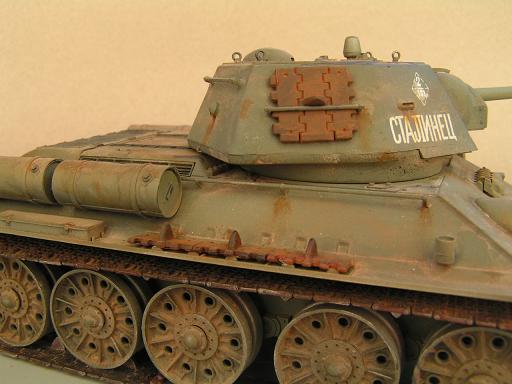
The matt varnish provided good surface for the pigment powders that were applied in the next step to create a dusty look. For this model I used MIG productions European Dust, Light Rust, some ivory black and iron oxide pigments that I picked up at the local paint supplier. Europe Dust was dry-brushed over the entire model and then treated with a wet brush to simulate dust accumulation in recessed areas etc.

Chipped paint were mimicked using Gunze Sangyo Mr. Metal gun metal in strategic places, while wear surfaces on road wheels, drive sprocket and idler wheel were treated with white metal paste from Tamiya’s Weathering Master set C. I found this paste to be of limited use because its application resulted in spreading small, sticky silvery particles all over the model.
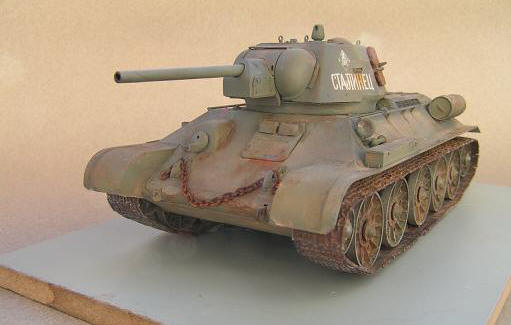
The extra length of chain was obtained cheaply from a necklace I found at a jewellery shop, and it was primed with red auto primer and the treated heavily with pigments to emulate rust.
Tracks
The rubber/vinyl tracks seem to be armour modellers’ collective nightmare. I washed mine thoroughly with water and detergent to remove grease from the manufacture, primed with red auto primer and airbrushed with black acrylic. Then a generous amount of European dust and light rust was dry-brushed on. I found the result of this procedure acceptable, though of course not comparable with metal or plastic individual-link tracks.
Conclusion
The overall experience of this build was positive. It is a simple kit if built out of the box suitable for a beginner like myself to practice painting and weathering techniques but it would require more attention and skill to turn the final result up to par with today’s standards in terms of details etc.

This article was originally published in IPMS Stockholms Magazine in September 2007